Update!
As of the latest version of Linux Mint (22.1) the below process no longer works for Encrypted ZFS Linux and Windows 10 dual boot. I’m leaving the article up as it contains some good info and best practices guides but it’s no longer going to result in a usable system
However! The good news is that I have a MUCH easier alternative process that works for the latest LUKS/ZFS encrypted LTS Ubuntu + Bitlockered Windows 11 to get you that “latest tech” new car feel! I’ll be writing up an article here soon as well as filming a Youtube guide. Watch this space!
1. Overview

This post will go over the process required to dual boot Linux Mint and Windows using encrypted ZFS for the root partition on the Mint partition. I have written this tutorial because, in the default Mint and Ubuntu Installer there is no native way to achieve this outcome. For those interested in playing around with or using encrypted ZFS in a non-standard dual boot scenario (looks meaningfully into a mirror) this is a giant pain in the ass. The default installer for Mint and Ubuntu, by default, uses 100% of the disk for the Encrypted ZFS partition and there is currently no UI available method to alter this.
Resizing the Encrypted ZFS partition after installation is, while theoretically possible, vastly difficult and resulted in full data loss the few times I tried it. As such I have come up with an “easy” workaround that allows you to manually alter the default settings in the installation media such that the root partition is built to the size you define leaving as much or as little space for further operating system installs as you like.
I am presenting it here as an end-to-end tutorial because it covers a lot of interesting topics and security nuances. I may write separate posts about some of these topics but if you learn best with a “follow along” style, this is for you.
This method has been tested with triple and even 4 way OS boots and works fine once you get the root ZFS issue sorted. Depending on the other operating systems you use, YMMV on how additional operating systems outside this tutorial eats your data, destroys your disk or kicks your childhood pet dog. You have been warned!
The tutorial uses Linux Mint, but Ubuntu desktop should work the same way. Additionally we will optionally install a prettier boot manager: ReFind, because I like it, it’s better and if you don’t like it you hate happiness.
In addition we will walk through installing a full disk encrypted Windows install using Bitlocker. This will require an install of Windows Professional to enable the Bitlocker options we want in this. But a non-encrypted version of Windows Home would work just as well if you don’t mind unencrypted windows, you monster.
The Items you will need for this install are:
- The current Linux Mint 21.1 installer ISO
- The Current Windows 10 Multi Edition installer ISO
How to burn these to a USB for installation is left to the reader, but there are many good tutorials online depending on your platform. If you’re testing this out in a VM, the ISOs above should be all you need.
This process works well in a VM for testing or on a full desktop (I use this configuration for my personal laptop.) Lets get started…
2. Install Linux Mint with ZFS encryption
The main issue with the Mint/Ubuntu installer is that it does not offer any configuration options when you select ZFS as the file system for the host machine. You don’t get to set size or the percentage of the disk that Mint/Ubuntu take up. By default it uses 100% of the drive. This is usually a good thing ™ due to the way ZFS works, but we’re building a testing/play platform here so lets ignore best practices in this case.
The Ubuntu installer uses a configuration file on the installation media to control the layout of the ZFS drive once it is selected in the UI and we can leverage this file, pre-installation, to define the amount of space we want Ubuntu to use on the host.
First boot from the Linux Mint desktop ISO or USB. Once you are dropped at the desktop, and before you install Mint/Ubuntu, open a terminal session. This is the icon is at the bottom on the right of the pinned icons

Once the terminal is opened run the following command:
sudo vi /usr/share/ubiquity/zsys-setupThis will fire up vi as the root user and allow you to edit the zsys-setup script that defines how ZFS uses the disk when it’s selected in the UI. This script can look a little intimidating when you first open it but we’re really only concerned about one location in the file. Scroll down until you see the following section:
		cat >> "${sfdisktmp}" <<EOF
${partprefix}${partswap}  :   size= ${ss}M,         type=0657FD6D-A4AB-43C4-84E5-0933C84B4F4F
${partprefix}${partbpool} :   size= ${bpool_size}M, type=6A82CB45-1DD2-11B2-99A6-080020736631
${partprefix}${partrpool} :                         type=6A85CF4D-1DD2-11B2-99A6-080020736631
EOF
What this section does it defines the 3 main components of the ZFS install filesystem structure.
- Swap
- The Boot pool
- The Root pool
The boot pool will contain all your needed boot items and swap is for… well swap. These are configured dynamically based on the memory installed in your system and total disk space. We don’t really need to adjust them. What we care about is the root pool. This is the main OS pool and the one we want to set a size on. By default the size is undefined and this makes it just use the entire remaining disk after the other two partitions are set.
Now, here’s where we all sadly have to do a bit of math. I’m really sorry, it’s unavoidable. Tears will be shed.
Decide how much of your total disk space you’d like to use for your Linux install and how much you’d like left over for your windows install. In this example I’m using a VM with 60 gig of space and I’d like to leave 30 gig for windows to be installed on. So, assuming Swap will eat about 4-8gig and the boot pool will be 1-2 I’m going to guess the space used by those two is about 10 gig (for easier maths, because it’s important to treat yourself now and then).
This means I probably want to allocate about 20 gig for the ZFS root disk. Now please keep in mind, this is not a lot and I’m only making it this small because this is a demo. On my main laptop with a 256 gig NVME I allocated 128 gig for the root pool, leaving 128(ish) gigs for the Windows install.
So, in this example modify the above code to change the line with partrpool in it to allocate 20 gig. This will make the whole section look like the following.
		cat >> "${sfdisktmp}" <<EOF
${partprefix}${partswap}  :   size= ${ss}M,         type=0657FD6D-A4AB-43C4-84E5-0933C84B4F4F
${partprefix}${partbpool} :   size= ${bpool_size}M, type=6A82CB45-1DD2-11B2-99A6-080020736631
${partprefix}${partrpool} :   size=20000M,          type=6A85CF4D-1DD2-11B2-99A6-080020736631
EOF
Once you’ve done this save the file and exit. If you don’t know how to save a file in VI… you should be ashamed of yourself, stop reading this tutorial immediately and go sit in your room and think about what you have done.
Now close the terminal and run the standard installer from the “Install Linux Mint” icon in the top left. Select all the standard options you want for your install until you get to the “Installation type” page. Here click “Advanced Features”

Once you are in advanced features select “Erase disk and use ZFS” and tick “Encrypt the new Linux mint installation for security” and click “ok”.
Back at the main Install type window press “Install Now”.
The installer will now ask you for a security key for your encrypted boot disk. Select a passphrase here that is long, secure and makes sense to you. Not a password, a passphrase. You will be entering this every time you boot into Linux, making it a phrase of 4-5 words (maybe starting with a capital, having one in the sentence somewhere and putting some punctuation in) will make it easy to remember and not make you chose a short, weak-ass, weak-sauce password, or alternatively one so long and weird that you’ll want to throw your laptop across the room every time you boot. I’m sure I’ll write a rant about this sometime in the near future.
Thanks for coming to my TED talk.
You can generate a recovery key here. That’s up to you. I don’t usually bother, but then I usually use good passphrases I won’t forget. *INTENSE STARE* So you do you.
Now go through the rest of the install process as you would normally.
At the end of the process you can simply select “Restart Now” but, if you want to check everything worked ok, choose “Continue testing”. Then, from the Ubuntu main menu in the bottom left, click and type “gparted”. This should auto-select the program gparted which is a Linux graphical disk layout configuration program. Run this.
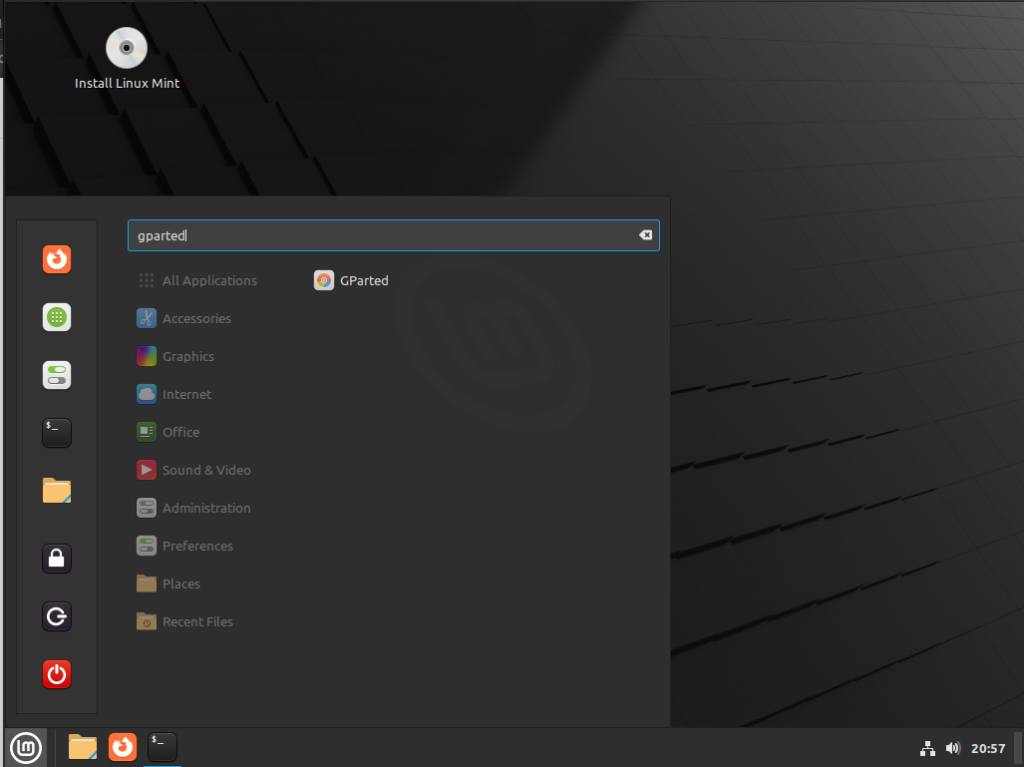
Once started you should see something like the below:

The important part is that the rpool partition is the size you expect it to be (in my case around 20gig ). There might be some small variance due to disk alignment requirements, but it should be within a gig. Ideally you should also see an “unallocated” that is the size you desired for the Windows partition. If you’re happy with how this looks,congrats! You math good!
Next, select the bottom left Linux Mint icon again, then the power button, then chose “Reboot”, remove your install media and boot into your new Linux system and make sure it looks like it’s working.
This will let you test your passphrase and make sure it works etc etc. I would recommend against doing any system updates at this time because if you screw up in the next few steps you’re gong to be re-installing Linux anyway so wait right until the end before performing any updates on any of the systems you’re installing.
If you’re happy with everything, shut the system down again and prepare your Windows installation media. Lets carry on…
Installing Windows 10 Professional with Bitlocker
Next we’re going to install Windows into the bank space we have left for it on the disk. Connect your Windows installation media and, at boot, select to boot from it. This is usually done via the system BIOS. Otherwise it will generally default boot into the installed OS on disk. In this case, Linux Mint.
Once your Windows install starts run through it as normal. If you have a registration key, enter it at install. If you do not skip this but make sure you install Windows 10 pro. If you install a version without support for Bitlocker, you will get dual boot Linux/Windows but the disk encryption sections of this tutorial will not work.
When you get to the install type chose “Custom”. This may seem counter-intuitive but trust me. Once you get to the screen to select the install location you should see an option at the bottom called “Unallocated Space”. If you do not, then something has gone screwy. I got this a few times in my VM. It can be a variety of reasons from non-efi boot type to legacy SCSI disks set in the VM. If you get this mess around with those settings in your VM until it works.
Select the Unallocated Space and click “Next”

Run through the rest of the install as per normal. The machine will reboot and boot into the final windows setup.
One thing you will notice is that Linux is no longer a boot option, this is because Windows takes over the boot order. In some cases it will show you a boot menu, but don’t expect it.
Setting up Bitlocker – The ‘right’ way
Once windows is successfully booted We’re going to want to enable Bitlocker, then make some modifications to it to increase security. This is all assuming that you have installed Windows Professional, if you didn’t skip ahead to the section for setting up a prettier boot menu, and dwell briefly on how disappointed I am at your unencrypted Windows install.
First off type in the Windows search bar “Bitlocker” and chose the Manage Bitlocker” option.
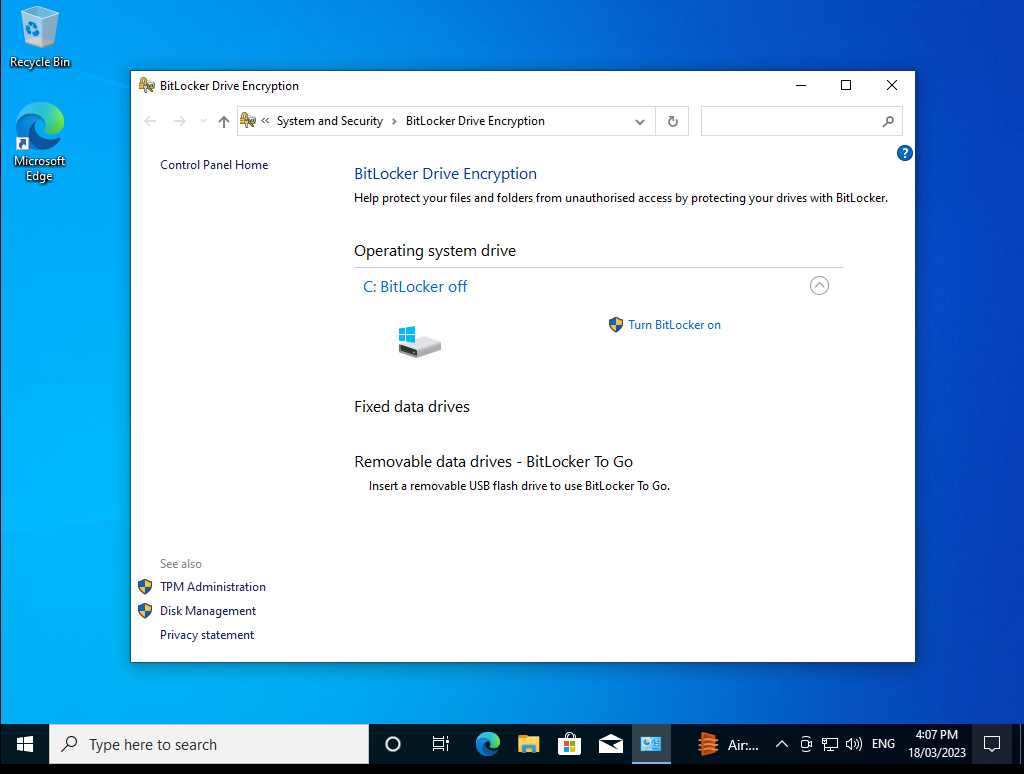
Turn on Bitlocker and run through the standard options. I highly encourage that you use the “new” algorithm when prompted.
Now, here’s where we have a quick sidequest to talk about the way Bitlocker secures your data. Bitlocker encryption is fine, not really worse than any other disk Encryption method out there. It uses XTS-AES 128-bit by default which is fine. If you want, you can change it to 256 in group policy. But it’s up to you.
HOWEVER by default it stores the key to unlock the drive in the TPM module so that the disk is automatically decrypted at boot. This next bit really deepnds on your risk profile. If you’re just encrypting your disk so that when/if your laptop fails, or you change the HD, you can throw the disk by itself in the garbage and not worry about it. It’s probably fine. Move on to the “Making it Pretty” section
BUT if your concern is :
- people stealing your laptop
- a hostile nation state taking a copy of the data if you cross their boarder
- You’re an activist in an unfriendly regime and getting your computer seized and inspected.
this is next to useless.. As long as the TPM and the HD are together, anyone can boot the laptop and decrypt the drive. If you’re ok with this (you’re not) and only want “throwing my disk away
security, then skip ahead.
In order to lessen this issue we can set aBbitlocker pin on boot that will set a password between the user and the drive before decryption, the same way the Linux install does. Yes you’ll have to put in two passwords when you boot to get to desktop, but that can be the price of security.
You can reduce this if you like by having both Operating systems boot directly to desktop, after all, you now have a full disk encryption password protecting your disk, just getting into the OS proves it’s you. There is a different risk here if you’re the “put my laptop into sleep mode” kinda person rather than a “shut it down between uses” kinda person. But again, that comes back to “is my laptop on” when one of the above seizures occurs, and if you’re crossing boarders with your laptop turned on… well, I can’t help you.
Anyway, lets set a boot PIN on Bitlocker. This is done via group policy, and if this is a standalone box you can just do it locally. If you’re on a domain it will be done differently but that’s outside scope of this article (my consultancy rates are quite reasonable).
The default bitlocker PIN is numbers only and not long so I don’t like it. Additional options can be set to make it a alphanumeric. Still limited to 20 chars, but it’s an improvement.
Click the search bar and type “edit group policy” and click on the widget that is offered to you.
Head to Computer Configuration > Administrative Templates > Windows Components > BitLocker Drive Encryption > Operating System Drives in the Group Policy window.
Double-click the “Require Additional Authentication at Startup” Option in the right pane.
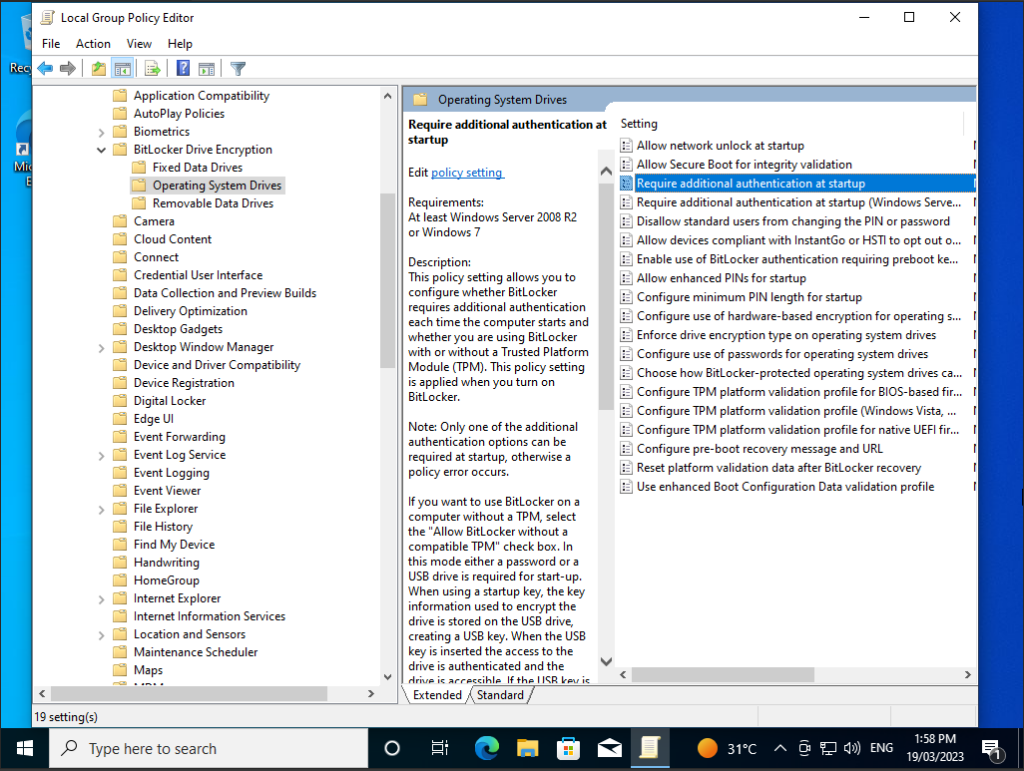
Select “Enabled” at the top of the window here. Then, click the box under “Configure TPM Startup PIN” and select the “Require Startup PIN With TPM” option. Click “OK” to save your changes.
Next in the above window select “Allow enhanced PINs at startup” This will enable alphanumeric pins.
Click “ok” and leave this window open in case you need to go back to tweak.
Open a command prompt AS ADMINISTRATOR (this won’t work otherwise) and ensure this group policy is applied by typing
gpupdate /forceNext set your bootup PIN/Password by typing:
manage-bde -protectors -add c: -TPMAndPINYou will be prompted for a “pin”. Put in an alphanumeric password here. This might have to be a bit more of a password than a passphrase than you would like because Windows limits this to 20 digits (boooooo) but put something in here you’ll remember and is as close to the 20 as possible.
Now reboot Windows and make sure your new boot password works. If you’re all good, Hurrah! You’ve successfully set up your two operating systems.
Now lets make it so you can chose which one to boot at startup.
This will require you restarting and dropping into your BIOS. Your BIOS will vary but you should be able to get to some kind of similar place to this where you can chose the EFI option to boot off.
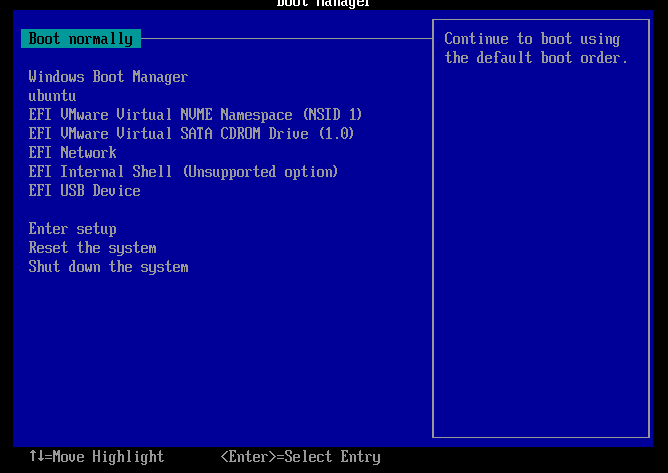
Select the “ubuntu” option to boot.
Once back in Linux, start a terminal and run the following command.
sudo update-grub2This should execute cleanly and add a windows option to your grub menu. Now we need to change the EFI boot order to set Linux to boot before windows by default. From your terminal type
sudo efibootmgrThe output from this can be a little confusing but should looks something like this:
BootCurrent: 0004
Timeout: 2 seconds
BootOrder: 0005,0004,0000,0001,0002,0003,0006
Boot0000* EFI VMware Virtual NVME Namespace (NSID 1)
Boot0001* EFI VMware Virtual SATA CDROM Drive (1.0)
Boot0002* EFI Network
Boot0003* EFI Internal Shell (Unsupported option)
Boot0004* ubuntu
Boot0005* Windows Boot Manager
Boot0006* EFI USB Device
Each boot option has a number (0000, 0001, 0002 etc) and what it is next to it. In this case ubuntu is 0004 and windows is 0005. The “BootOrder” shows you the current boot order in the bios. In this case, Windows, then Linux then the hard drives first OS in EFI etc.
We want to change this to Boot linux first. Take that line and move your ubuntu entry to be before the windows entry and use efibootmgr to set it . In my case this would look like:
sudo efibootmgr -o 0004,0005,0000,0001,0002,0003,0006Look at the output and verify that the new order matches what you expect. Now reboot and your machine should boot into Linux by default. Grub should also have an option to boot windows.
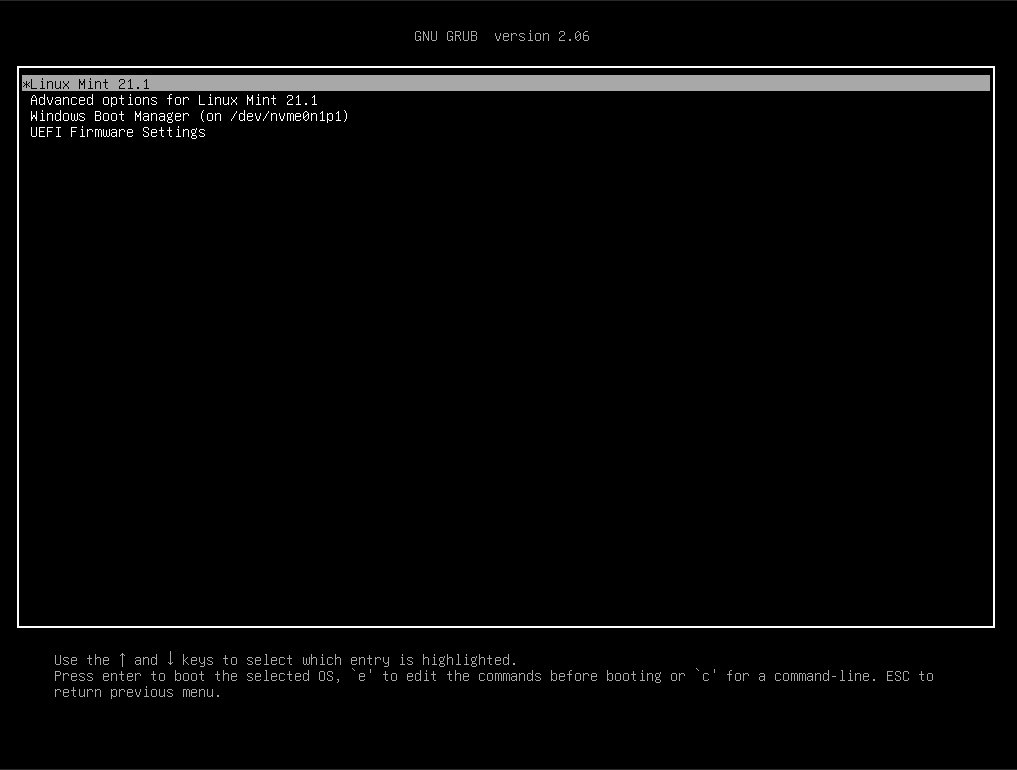
If you’re aesthetically challenged and you’re happy with this then feel free to stop here and you’re done!
Boot into each OS and run full updates and get them set up how you like. Congrats, you have pretty secure dual booting Windows and Linux with ZFS and good security options. There are things we can do to improve this setups security, But those will be the subject of future posts.
If, however, you would like a prettier boot menu. Read on below. I will use ReFind for this as I like the look/feel and it has themes you can use to make it much prettier
Making it all prettier.
ReFind is an alternative boot manager for Linux, MacOS and Windows that, for multi-boot systems, seriously increases the prettiness of the startup sequence. And also allows for some extra options and various boot parameters. I like it, you may not. But it’s up to you. It can be found here:
https://www.rodsbooks.com/refind/
Installing it on Ubuntu is as simple as running the following commands:
sudo apt-add-repository ppa:rodsmith/refind
sudo apt-get update
sudo apt-get install refind
When refind installs it wil ask to automatically add refind to the ESP. Say “yes” here.
That’s it! Now reboot and you should have a new boot menu like this:
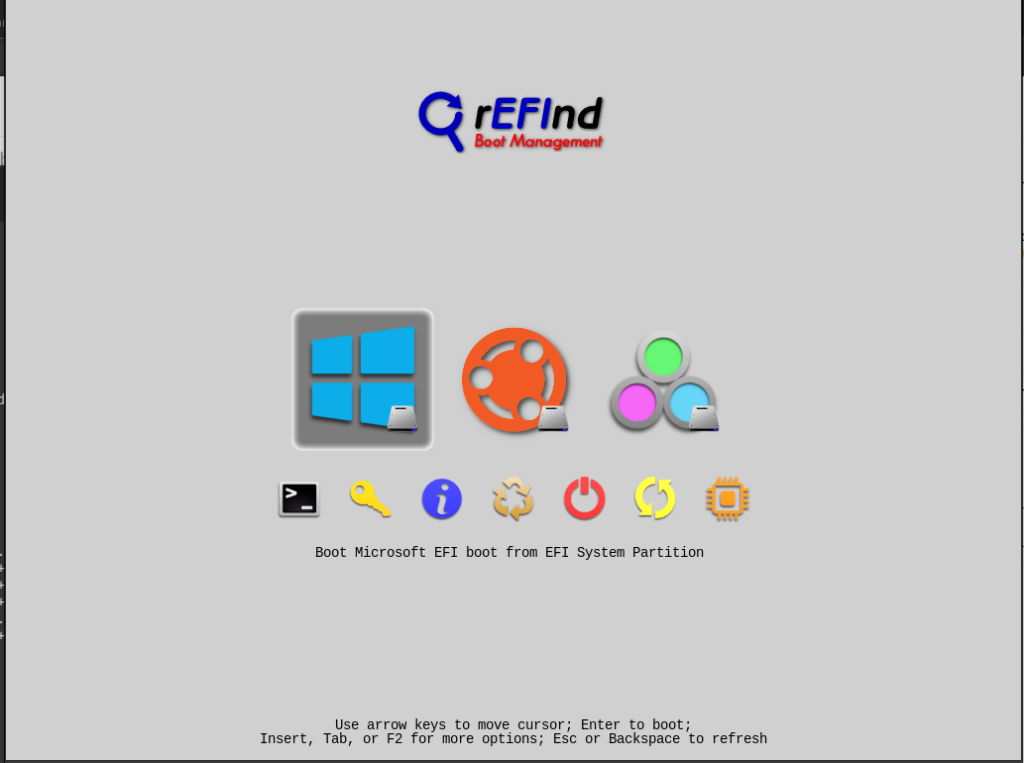
The default refind menu isn’t the best but you can install much better themes by doing a google search for “refind themes” and installing the one you like the most. A good starting point is here: https://github.com/topics/refind-theme
I personally like refind minimal theme. But YMMV.

And that’s it! Refind will (if you select Ubuntu) still boot into the grub menu which is an extra click but there are tutorials online about how to skip the grub menu if you like, I’ll leave you to find those if you want to avoid the extra enter.
Thanks for following along with this tutorial. We will build on some of the concepts here and delve further into the weaknesses of encrypted installs like this in the future (most of which revolve around the “$5 Wrench” problem.) And we’ll look at increasingly paranoid ways to avoid this issue. FUN!
Adventure awaits! Huzzah!
